31 January 2012

Tikoy

One thing I always look forward to during the Chinese New Year is Tikoy, also known as Nian gao. I absolutely love this sweet glutinous rice cake. It is said that eating it will bring good luck. I don't know about that, but it is so delicious that I almost feel lucky when I eat it.

It came in a nice little red box

Look how sticky it is!

There are many different varieties of tikoy, but the one usually sold in the Philippines is usually prepared as a dessert or a sweet snack instead of being savory. To prepare this, we usually just beat an egg in a bowl, then cut the tikoy up into little rectangular pieces. Then we did the tikoy into the egg and pan fry it. The only thing left to do is to enjoy it.


26 January 2012

Of Macaroni Soup


There are time when all you really want is something warm. That's where macaroni soup comes in. It's definitely my go to winter soup. The funny part is that in my family, we always serve this with rice. (Ok, we serve everything with rice, even spaghetti. Weird, I know.) It was one of the first things I learned to cook when I was younger. 


This particular soup, though, is slightly different from the macaroni soup of my childhood days. Just slightly different. In the macaroni soup of the past, I would normally saute the onions and the garlic first then add the cooked chicken meat, the vegetables, the macaroni, chicken broth and finally the milk. In this one, I cooked everything in one pot. And, let me tell you, it still tastes great!


Macaroni Soup 
1/4 chicken, skin and bones one and cut into pieces
2 cups water
1/4 cup elbow macaroni
1 small onion or 1/4 large onion
1 small carrot, cubed
5 crimini mushrooms, halved
1/2 cup milk (evaporated or fresh)
1 chicken bouillon cube
1 handful of frozen peas
1 handful of frozen sweet corn
1/2 dried parsley
salt and pepper

In a pot, add the chicken pieces and pour water over it. Place the pot over medium high heat until it comes to a boil. Lower the heat and allow the chicken to cook. Fish the chicken pieces out of the pot and set aside.  Keep the pot with water on the heat and add the macaroni to the water. Once the macaroni is just about to be cooked, add the onion, the carrot and the mushroom. Cover the pot and allow them to cook. 

Meanwhile, shred the chicken with a fork. Then add the shredded chicken to the macaroni. Add the milk and the bouillon cube. Stir until the cube has dissolved. Add the peas and the corn. Simmer for 2 minutes and add the parsley. Season to taste and remove from the heat. Transfer to a serving dish.

Note:
  • You can leave out the bouillon cube if you want, but I find that it enhances the flavor of the dish. Alternatively, you can substitute water with chicken stock and leave out the bouillon cube.
  • You can also make this dish by first sauteing 3 cloves of garlic and the onion, then adding the shredded chicken. Pour the cooking water, milk, macaroni and vegetables in. Season to taste.
  • Oh, and this serves two people. 


25 January 2012

Of Failures

First attempt at orange muffins

Even the best of us can fail sometimes. In fact there's tons of scientific literature on human error and how to avoid it. Engineers design systems specifically to minimize these errors. Sometimes the solution is as simple as getting enough sleep, but sometimes it's as complicated as designing a new system. I guess it's the same thing in baking and cooking. There a loads of ways one can make mistakes in baking and cooking. And though I've never burnt the kitchen down, I've had my moments of failures. Here are two examples.

I've wanted for some time to make orange muffins and since we had the most beautiful supply of oranges this year, I thought it would be the perfect time to make them. My first recipe came from: The Domestic Goddess blog. From the very start, I thought it was weird that the recipe did not include any leavening agent like baking powder or even baking soda. Still, I desperately wanted to make these, so I followed the recipe, despite my doubts. My second mistake here was simply changing the lemons to oranges, without remembering that the oranges were very sweet on their own. The result was a sickly sweet muffin that felt more like rubber than a muffin.


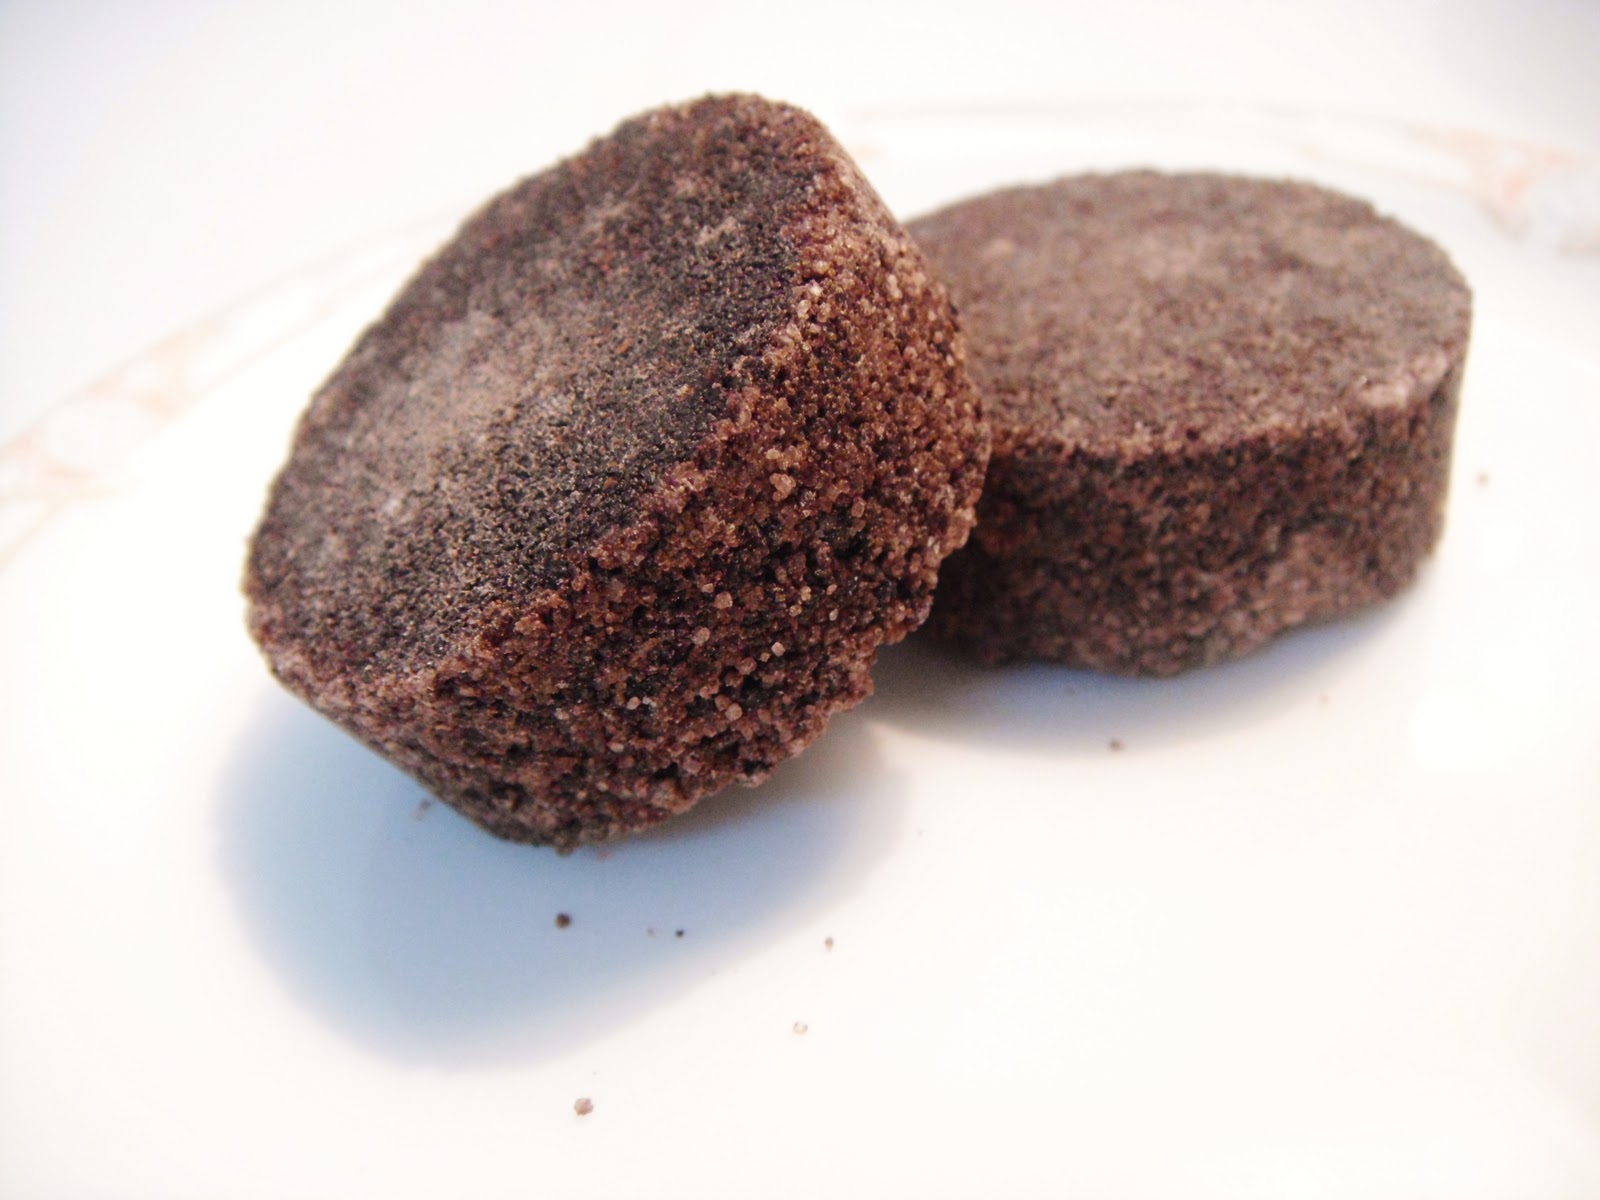
My second attempt turned out better, but I still managed to make a mistake. The good part was, it's not really my own fault. Has anyone told you that sometimes you cannot trust your senses? Well that's definitely true here. When I made the second batch, I picked up a jar filled with what I thought was flour. Yes, looked, felt and smelled like flour, and in my head I thought ", It must be flour." How totally wrong I was. Once the muffins baked, they looked a lot better than my first attempt despite not having a muffin top. Unfortunately, they had an odd flour-like smell to them. I was about to chalk all these up to me using old flour, but when I told my mom about it, her face fell. It turns out I might have used rice flour instead. Since my mom's kitchen did not really have labels, I must have picked up the wrong jar. See what I mean about changing the system?


Anyway, I would still use this recipe from Pinch of Yum again. Hopefully the next time I make muffins, I'll actually have the right flour. The muffins actually taste good despite the floury smell.


Orange Muffin
1/3 cup milk
3 tablespoon vegetable oil (I used canola)
1 egg, beaten
2 tablespoons corn syrup
juice of 1 large orange (I used naval oranges)
1 cup flour
1/3 cup muscovado sugar
1 1/2 teaspoons baking powder
1/4 teaspoon salt

For glaze (optional, I opted out)
1 cup powdered or icing or confectioner's sugar
2 tablespoons orange juice

orange zest plus white sugar (1:2 ratio)

Start by preheating the oven to 350F or 180C. Whisk milk, oil, egg, corn syrup and orange juice together. Add flour, sugar, baking powder and salt. Stir until just combined. Pour into a prepared muffin pan and bake for 10-15minutes.

For the glaze, combine the powdered sugar and the orange juice. Drizzle this over the muffins and sprinkle a mixture of orange zest and white sugar on top.


Edit: I finally found out what sort of "flour" I added to the muffins. My dad says it's semolina. Trust me to mistake semolina for all purpose flour.

18 January 2012

Of Champorado

Hmmm...champorado. It's definitely the one dish that just makes me feel all warm and fuzzy inside. What is it? Filipino chocolate rice. Ok, ok...technically, it comes from Mexico, brought to the Philippines by galleon trade. In case you were wondering what the galleon trade is, it's trade route between Acapulco, Mexico and Manila, Philippines back when both countries were Spanish colonies. People back then traded spices, silk, porcelain, and, most importantly, recipes. 
Yummy Champorado

Make no mistake though, that Mexican champurrado is very different from Filipino champorado (also spelled as tsamporado, since the Tagalog language doesn't actually have the leter 'c' in it). Mexican champurrado, according to Wikipedia, is actually Mexican hot chocolate. Filipino tsamporado, on the other hand, is warm, chocolatey rice porridge. Traditionally, it's cooked with glutinous rice (short grained, sticky rice) but you can also use left over white rice (that's what I used). It gets its chocolate flavor from Filipino chocolate tablets or tablea, which has a more intense chocolate flavor since it is made from pure cacao nibs which were roasted and grounded into a paste and hardened into tablets. The chocolately rice is then sweetened with brown sugar, preferably muscovado and served with a dash of evaporated milk. 

Tablea

Tsamporado is perfect for cold weather or whenever you're down. Chocolate can wash any the blues, right? Champorado can also be eaten for breakfast. If you plan on doing this, don't forget the tuyo! That's salty dried fish. You can also (and I love doing this) refrigerate it until it's cold and eat it like chocolate rice pudding. Yum!


Champorado
2 cups left over white rice
5 cups plus more if needed, water
3 tablepoon muscovado sugar
2 tableas
evaporated milk to serve

In a dutch oven or a large pot, add the rice and 4 cups water. Place the pot over medium heat and bring to a boil, stirring occasionally. Once boiling, add the tableas. Stir until the tableas have broken down and combined with the rice and water mixture. Cook until the rice and the water mixture have formed a thick soup that is slightly smooth. If there's too little water, add more as needed. Stir in the sugar. Pour into bowls and drizzle evaporated milk on the top.


Note:
  • If you plan on using glutinous rice, use more water. I suggest a 1:5 rice-water ratio. 
  • You can also use cocoa powder instead of tablea. It'll have a slightly different flavor, but it'll still be good. Beware though, if you use dark chocolate powder, you will have an extremely dark champorado, and not the traditional lighter brown color. I know, coz I've tried this.


17 January 2012

Of Cocoa Brownie


My mom had always insisted that using cocoa was better for making brownies than my usual melted chocolate. When my mom insists on something, you follow. So I looked up a brownie recipe that used cocoa powder instead of chocolate. I found this recipe from Smitten Kitchen. I tweaked it a little by using muscovado sugar instead of white sugar and reducing the amount to one cup only instead of 1 1/4 cups. The result? A more adult and less sugary brownie. It still retained its fudginess, but its chocolate flavor seemed to intensify.


Cocoa Brownie
10 tablespoons butter
1 cup muscovado sugar
3/4 cup plus 2 tablespoons unsweetened cocoa powder
1/4 teaspoon salt
1 teaspoon vanilla extract
2 large eggs, cold
1/2 cup all purpose flour
2/3 cup nuts, like pecans or walnut or cashews (optional, I didn't put any)

Preheat the oven to 325F or 160C. In a heat-proof bowl, add the butter, sugar, cocoa powder and vanilla extract. Place the bowl over a pot of barely simmering water. Stir until the butter has melted and the mixture is hot enough such that you instinctively remove your finger after testing it (I thought that was a funny way of putting it, but yes, it's in the recipe). 

Remove from the heat and set aside to cool a bit. The mixture should be warm and not hot. Stir in the vanilla extract. Add the eggs one at a time, stirring vigorously after each addition. Once it's well-blended, shift in the flour. Stir until well-blended. At this point, you can add the nuts if you want. Stir again, if you do. 

Finally, pour the batter into a prepared 8x8 inch pan. Make sure to use parchment paper or foil as this will help in removing the brownies from the pan. Bake in the oven for 20-25 minutes. Once done, let the brownie cool completely before cutting. I suggest refrigerating for about an hour first before cutting. Finally cut into tiny squares and serve!


06 January 2012

Of the Triple Chocolate Cake


 I'll admit it. After making the basic chocolate cake awhile back, my family's been craving for another round of chocolate cake, and what better time to have chocolate cake than Christmas? For this cake, I used the same recipe I used for the basic chocolate cake, but with the addition of chocolate ganache and chocolate frosting.

I sandwiched chocolate ganache between two layers of dark chocolate cake. Then, spread some of the chocolate frosting and drizzled even more ganache on top. Let me tell you, there was no leftover. The kids who were at the party just gobbled it up. The cake was moist and practically oozed chocolate. It was definitely the star of the dessert table.
Ready for the party!

Chocolate Ganache
9 oz Bittersweet Chocolate, chopped
1 cup Heavy cream

In a double boiler (or a makeshift one), bring the cream to a boil. Add the chocolate. Whisk until the chocolate has melted and the resulting ganache is smooth and shiny. (You can add a tablespoon of rum too if you want, but I decided not to)

Chocolate Frosting
(I used a variation of the vanilla frosting I used in my previous cake)
4 tablespoons butter
2 cups icing or confectioner's sugar
2 tablespoons milk
1/2 teaspoon vanilla extract
1 pinch f salt
4 tablespoons chocolate ganache

Beat everything together until light and fluffy.
The last slice is for the cook!

05 January 2012

Of New Year Challenges

I've decided to set a few culinary challenges for myself this new year. When I first moved to the US, I realized that I knew very little about Filipino cooking. I mostly had an idea about how a dish was made, but not the exact recipe. It's mostly my parent's fault. They've always cooked the classics so perfectly, that I've always been a little afraid to try, lest I destroy the dish. There have been many times when I've wanted to cook a dish, like pancit for example, and realized that I didn't even know what kind of noodles to get. Other times, I've found myself using short cuts. (Think tamarind mixes for sinigang or kare-kare mix from Mama Sita). So this year, I've decided that that I will try to cook at least two of these dishes on this list:

1. Kare-kare from scratch: I'm going to grind my own peanuts and my own rice, as well as make my own peanut butter for this classic Filipino dish. No Mama Sita for me! (I also realized that if I were in other countries, it'll probably be easier to find rice and peanuts than to find Mama Sita. Hence, why I need to learn it from scratch)

2. Bibingka: One of my absolute favorite Filipino rice cakes. I've already found a recipe and it looks easy. That alone shouts "make me!".

3. Daddy's Pancit: A few weeks ago, I witnessed a conversion. My boyfriend who hates almost any kind pancit wolfed down my dad's pancit. With lots of carrots, string beans, shrimp and chicken, and just the right amount of seasoning, my dad's pancit is definitely the best one out there...and I need to know how to make it.

Dad's pancit. I realized that he also added mussels, and chunks of chicken liver to it.
4. Pancit Lomi: I once tried making this, but it turned out to be quite a failure. This year, I'm going to try again and it's going to taste really goo.

5. Arroz Valenciana: Nothing says celebration like Arroz Valenciana. Enough said.

Dad's Arroz Valenciana
6. Finally, I want to decorate a cake like a pro. Well, maybe not on the scale of an elaborate wedding cake or even a boat cake or a bag cake.  But I'd like to be able to decorate a cake good enough to be sold in a cake shop. That means working with buttercream and other such frostings.

We'll see how many of these I'll actually be able to do this year. I am so looking forward for 2012!